Wednesday, October 12, 2011

Frontier House: PBS Series

I recently watched Frontier House that aired on PBS back in 2002.  Frontier House is a series of 6 episodes where 3 modern-day families went back to live the life of a family in 1883 for 5 months. Back in 1883, people came from all over to claim their 160 acres of land, but only after living on their frontier for 5 years:  1 out of 3 families survived the life on the frontier.
The families that PBS chose were pretty interesting. 

  • The Brooks Family: This family is an African American family, which they said were more common on the frontier back in 1883 than books portray.  At the beginning of the series, Nate and his father, Rudy were at the homestead for the first five weeks to help build the homestead.  Then Nate’s (real) fiancĂ©, Kristen came and they got married on the homestead. Rudy left the frontier and let his new daughter-in-law resume life with her new husband on the frontier.
  • The Clune Family:  This family is from Malibu, California where the father was an executive for a company and they appear to be pretty affluent.  The mother, a native of Ireland, was a stay-at-home mom and they had 3 children.  For some reason, the Clune family also brought their niece to the Frontier House.
  • The Glenn Family: The Glenn family is a blended family from Tennessee.  This is the second marriage for the mother and her children are from her previous marriage.  Throughout the series, you can pretty much watch the relationship of the mother and her husband unravel – it is really sad, because the children were thriving on the frontier. 
For 5 months, these families had to help build their own cabins (except the Glenn Family who got a pre-built cabin in their scenario.)  From the very beginning, the families got a real taste of what it was like to travel to their destination and what obstacles the pioneers faced (I wont spoil it for you – you have to watch it!) As the viewer, you get to watch what day-to-day life was like for the women, children and the husbands.  It was great!

I often romanticize about living life back in the 1800’s, but after watching this series, the “simple life” was not so simple!  I would love living off the land, but I do have my limits.  Anyone interested in homesteading or learning about what life was like back in 1883, I highly recommend this educational DVD!


DISCLAIMER:  I was in no way compensated to provide a positive or negative review on this video.  I watched the DVD out of my own curiosity and all opinions expressed are my own.   

Monday, October 10, 2011

Apples Galore!

Around this time last year, Todd and I found an awesome vineyard and orchard in North East, PA that sold “deer apples” at $4.00 for a little more than a bushel.  Deer apples are apples that have fallen from the tree, but they aren’t necessarily bad.  Actually, the majority of the apples are perfectly fine, many without any blemishes at all!  When we got home, I was just dieing to find out how much the box of apples weighed, and they were 53 lbs.  Now that’s a good price on apples ($0.08/lb!)  I gave some away, made several batches of applesauce, apple pie filling, apple bread, apple dumplings, and we just ate the apples too.

This weekend, Todd and I made a special 2 hour road trip to pick up deer apples, take in the beautiful fall colors of changing leaves and explore the area a little bit.  I called the orchard ahead of time to make sure they had the apples available and to confirm the pricing.  The deer apples went up $1/box, but at $5/box, they are still a great deal!  We ended up picking up 3 cases.


When we got home, we weighed them as we did the year before, and this year, we have 135 lbs of apples.  You didn’t read that wrong.  One hundred thirty five pounds of apples!  This equates to $0.11/lb for apples this year.

This is what 135 lbs of apples looks like!

Over the next several weeks, I will be posting a lot of apple recipes that I am making as I peel and core the apples.  (Hopefully I will have time to post considering I have to get these apples peeled, cored and prepared before we leave for vacation in two weeks! Eek!)  I am looking forward to making several batches of crockpot applesauce (to give as gifts), apple butter (gift), apple cake, apple pie filling (gifts), apple crisp, apple chips, apple everything!

Around November 15th of last year, I mentioned to Todd that I never wanted to see another apple again.  I had peeled and cored over 40 lbs of apples by hand.  This year, I have an applecorer and peeler that my mom got me for Christmas.  This should make it easier on me this year to be able to get these apples cored and peeled in “no time” (meaning a few weeks!)

The apple corer/peeler my mom got for me last Christmas.

If you have any awesome apple recipes, I’d love to try them out!  Please email me at sparingchange@gmail.com .

25 Weeks 'Til Christmas: Week 11 Peanut Wreath

This week's gift idea came from something I saw at my dad's house.  They have a wire holder to put peanuts in to feed the birds and squirrels.  I absolutely love the idea and I think it'd be a great gift for anyone who enjoys feeding the critters throughout the Winter.  I know this would be great for my father-in-law and I wouldnt mind making a couple for our critters!


Photo Credit

Instructions for Peanut Wreath

This wreath will attract larger birds such as blue jays.

What You will Need

  • Wire coat hanger
  • Sugar glue (see recipe below)
  • Whole unshelled peanuts

How to Do It

To make the peanut wreath, all you need is a bag of whole peanuts, a wire coat hanger and some special “glue” using flour, water, and a little corn syrup (see recipe below). Make sure the glue is gooey and thick before applying.

  1. First shape the coat hanger into a circle, leaving the hook on.
  2. Glue a single layer of peanuts all around the coat hanger.
  3. When the first layer is dry, make two or three more layers, arranging the peanuts at different angles to create an attractive wreath.
  4. Ensure that you let each layer dry before applying the next.

Peanut Wreath Glue Recipe

Mix the following ingredients together in a bowl and then use a small brush to apply:
 

  • 3/4 cup flour
  • 1/2 cup water
  • 3 tablespoons corn syrup

Every Monday through the week of Christmas will be a new homemade gift idea/project. Be sure to check them out! Happy Crafting!


Thursday, October 6, 2011

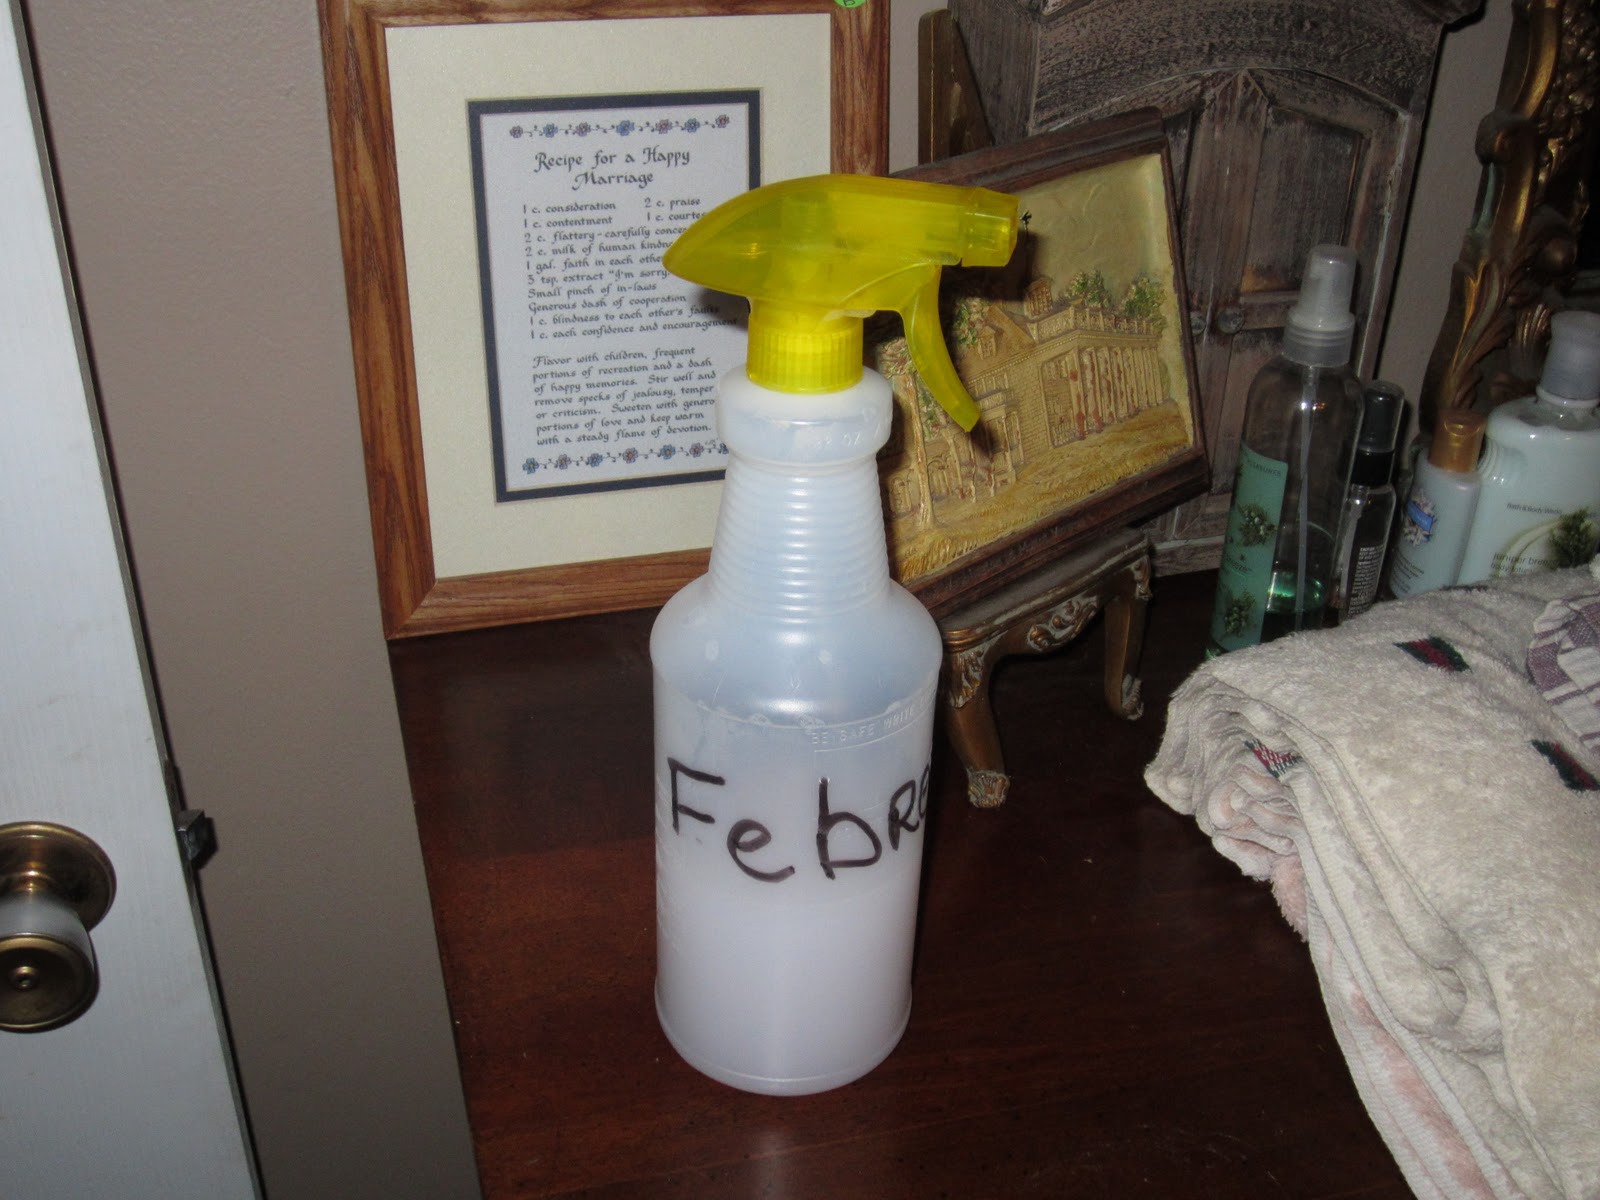
Recipe: Homemade Febreeze

I love when a room smells fresh and clean.  Sometimes, due to projects going on around the house, having (wet) animals running around the house, or accidents, our home does not smell fresh and clean.

The following is a recipe for homemade Febreeze to help keep your furniture, bedding and a room smelling nice and fresh.

Ingredients:

Liquid Laundry Softener
Baking Soda
Water

Directions:

  1. In an empty spray bottle, pour in ½ cup liquid laundry softener
  2. Put in 1 Tbsp baking soda (to help with pet smells)
  3. Fill the rest of the bottle up with water
  4. Before using, shake
Todd uses this solution to freshen up the spare bedroom when someone comes to visit and it’s been sitting empty for a while.  We also like to use this on our sofas, loveseats and wingback chairs to help keep them fresh.

This solution costs pennies compared to the brand name product in the stores!


Tuesday, October 4, 2011

Continually Working on the Marriage

I listen to a couple of great marriage podcasts* every week.  It helps me to gain insight about my marriage and what I can do to help improve our marriage.  As Tony & Alisa DiLorenzo from ONE Extraordinary Marriage say, marriage is not 50/50: it's 110/110!  

I have been contemplating starting a book series and discussion related to marriage beginning January 2012 as one of my “New Year’s Aspirations,” but I feel like this is something that shouldn’t wait.   I am continually looking for ways to work on my part of the relationship with my husband, and I would like to start this series and discussion fairly soon (beginning of November.)  In my opinion, improving on a marriage shouldn’t be put on the backburner because it will just create friction, tension and eventually a blow up if you are not communicating together. 

That being said, I am considering starting a message board where others can join in on the discussion of the particular book/topic that is being discussed at the moment.  My thoughts are that anyone who is interested in this could sign up as an anonymous user and we could chat openly about our marriages with a certain level of security and anonymity for those who feel more comfortable doing so that way.  No one would be able to gain access to the discussion board without my approval before-hand. 

Would anyone be interested in starting a book series and message board discussion with me to help improve and grow in our marriages?  If so, please shoot me an email at SparingChange@gmail.com . 
Otherwise, I will be reading these books on my own and possibly posting on the blog.

Some of the books I’d like to read/discuss:

The 5 Love Languages (I’ve read it before, but I think it is worth going over again)
The Love Dare
The Surrendered Wife
Stripped Down
Fit to be Tied
Boundaries
Changes that Heal

I would love to hear your thoughts and opinions.


*Links to podcasts:
One Extraordinary Marriage
Beyond Your Wedding Day

Monday, October 3, 2011

25 Weeks 'Til Christmas: Week 12 Applie Pie in a Jar

Did you see that?  12 weeks (3 months) until Christmas!

This week's homemade gift is somethigng I found on the blog, WhatTheFork, some time ago but I cant seem to find it now that I need it for the series!  Here in Ohio, it is apple season, and I cant wait to buy several cases of apples this weekend in Erie, PA so I can start making this recipe (among others) for gifts.


Photo Credit

Apple Pie in a Jar

Ingredients:
  • 4 1/2 cups white sugar

  • 1 cup cornstarch

  • 2 teaspoons ground cinnamon

  • 1/4 teaspoon ground nutmeg

  • 1 teaspoon salt

  • 10 cups water

  • 3 tablespoons lemon juice

  • 7 quarts peeled, cored and sliced apples


  • Directions:
    1. Place a rack in the bottom of a large stock pot. Fill pot with hot water. Sterilize 7 1-quart canning jars, 7 lids, and 7 rings by placing on rack, jars upright. Bring water to a boil. Boil 10 minutes. Remove with a holder and allow jars to air-dry. Save water for processing apples.
    2. Combine sugar, cornstarch, cinnamon, nutmeg, salt, and water in a large saucepan. Place over high heat and cook until thick and bubbly, stirring frequently. Remove from heat and stir in lemon juice.
    3. Tightly pack apples into sterilized jars. Slowly pour syrup over apples, covering them completely. Gently tap jars on countertop to allow air bubbles to rise. Screw lids on jars.
    4. Carefully lower jars into pot using a holder. Leave a 2 inch space between jars. Add more boiling water if necessary, until tops of jars are covered by 2 inches of water. Bring water to a full boil, then cover and process for 30 minutes.
    5. Remove jars from pot and place on cloth-covered or wood surface, several inches apart, until cool. Once cool, press top of each lid with finger, ensuring that seal is tight (lid doesn't move up or down at all). Sealed jars can be stored for up to a year.
    Every Monday through the week of Christmas will be a new homemade gift idea/project.  Be sure to check them out!  Happy Crafting!