Showing posts with label HomeMade. Show all posts

Monday, February 25, 2013

Recipe: Homemade Laundry Detergent (HE Washer Friendly)


Yield: 10 gallons 

Ingredients:

  • 1-14.1oz. bar of Zote Soap (the pink stuff found in the laundry isle)
  • Water
  • 1 cup Borax (optional)

Equipment Needed:

  • 5 Gallon Bucket (you can get these free from the local bakery)
  • Stir Stick
  • Cheese Grater
  • Funnel
  • Cup
 
Instructions:


I forgot to mention: Shake well before pouring.
 
 
Zote soap usually sells for less than $2.00/14oz. bar at WalMart or Target; however, it is not available where we live (we looked at 10 different stores within a 50 mile radius of our home).  That being said, I ended up purchasing 6 bars on eBay at $3.12/bar.
Price Breakdown:
What we were using before the homemade detergent:
 
100 loads at $7.69/jug
Price per load: $0.0769/load
Homemade Detergent:
 
Zote Soap: $3.12
Borax (I had on hand – I would say I used $0.50 (or less) worth)
Price for 10 gallon batch: $3.62
Price per gallon: $0.362
Number of loads per gallon: Approximately 16
Price per load: $0.023
The real question: Does it work?
I have been using this detergent solely for about a month now.  I have seen absolutely no difference between the detergent we had been using and the homemade detergent.  For 1/3 the price of the store-bought detergent, hubby and I both agree that the homemade is just as good (if not better) than the store-bought detergent. 
My husband has a stinky, labor-intensive job that makes his clothes almost black after a full day of work.  Unlike the homemade detergent I’ve made in the past, this stuff leaves his clothes clean and smelling fresh.  I decided to use the borax in our detergent mainly because of how dirty his clothes get at work.  Hubby recently washed several of his jackets, and before he went outside, he opened up his jacket and told me to “smell.”  It smelled nice and clean – and I love it!  ((Yes, I like when laundry has a scent to it.  When we wash sheets and the comforter, I lay in bed and sniff for a few days before my nose gets used to the scent.))


Do you make your own laundry detergent?
What has been your experience? 

Friday, December 28, 2012

Repurposing Christmas Cards

I absolutely love the beautiful pictures and creativeness of Christmas cards.  Each year, I have a handful that I fall in love with and I hate to see them go when Christmas is over.  There are a few ways that I am now repurposing Christmas cards that I receive.

Postcards*

I write to our Compassion child regularly.  Sometimes, instead of writing her a message through their online site, I like to send a physical card.  If a Christmas card does not have writing on the front cover, I cut the card in half, write a little note for Anabel and put a postcard stamp on it to send it off.  This way, not only do I get to enjoy the postcard for some weeks, our Compassion child is able to enjoy it as well. 

**Please note that in order to use a postcard stamp, the card cannot be any larger than 4.25" x 6".


Frame It!

We keep our Christmas decorating to a minimum, but I like having a few things dispersed throughout the house.  Picture frames are available for $0.10-$0.50/each at flea markets and garage sales.  When I find one that I like, I snatch it up and display the holiday cards in the picture frame.  The great part is, on the “Happy Holidays” cards, I can leave them out until February before putting them away for the season (or taking them out and using as post cards for next year!)

Original Card

New Winter Decoration
 

Gift Tags


I found a website that shows how one person recycles their Christmas cards into gift tags for the next year!  What a great money-saving idea.


Source : A Spoon Full of Sugar Designs

 
Do you recycle the gift cards you receive each year?

Monday, December 17, 2012

Midgilist


It is a little known secret that at work, my nickname is Midge.  It is an inside joke because I had a vendor call me from another country and ask for “Midgin.”  Lucky for me, it was one of the sales reps that took the call and the nickname has stuck ever since. (Please note the sarcasm.)

My coworkers think I am absolutely crazy for all of the things we do in our family.  I have been told by a friend that he is creating a new term for people like me and it is called Midgilists.  What kind of person is a Midgilist?  Someone who goes above and beyond to find ways to do everyday tasks for little or no money.  He is pretty much telling me that I’m cheaper than cheap.

I asked him why he felt this way, and he fired back with about a dozen of the following things I have done over the years.  When I thought about it, I added to his list just to give you an idea what a Midgilist does:

  • Raise chickens for eggs
  • Raise chickens for meat
  • Going no ‘poo
  • Researching (and still considering) bamboo as a renewable heat source
  • Research solar panels and windmills (and ways to make them ourselves for less!)
  • Grow a garden
  • Cut our own hair
  • I touch up my roots using hydrogen peroxide (for pennies a month)
  • Plant perennial fruits, vegetables and herbs
  • Crochet some of my own sweaters
  • Create a chicken garden to help cut the costs of chicken feed
  • Breed mealworms as a food source for our chickens
  • Harvest mealworm poop to fertilize the garden areas (a new infatuation of mine)
  • Make homemade vanilla
  • Brew our own beer/wine
  • Can the overabundance of apples
  • Make homemade jams
  • Freeze vegetables to consume throughout the winter
  • Make our own soap
  • Convert our vehicle (Kia Rondo) into a mini-camper
  • Do our own oil changes and car maintenance
  • Home improvements using recycled materials
  • Cancelling the satellite and installing an antenna instead (we get over 30 channels now, by the way!)
  • Homemade laundry detergent (a new recipe for our HE )
  • Homemade dishwasher detergent (another new recipe)
…and the list keeps going on and on.  Until I sat down and thought about all of these things, I completely forgot we do most of them!  We do these tasks on such a regular basis that it is second-nature to us and we don’t feel it is really out of the ordinary.

There are some people who are preppers and others are survivalists…but I’m a Midgilist and I’m OK with that.  I am proud to be thrifty and willing to put some elbow-grease into whatever we do to help save money and become self-sufficient.  There is much more we could do to improve on our Midgilism in the upcoming years.

Until then, may the Midgilists unite!

(I know there are a few of you out there. J)

This post is lined to the Farm Girl Blog Fest.


Monday, April 23, 2012

Canning Strawberry Jam in December


The week before Christmas (2011), I was in the kitchen canning strawberry jam!  Yes, you read correctly: strawberries.  That delicious fruit that starts producing in the spring. 

The reason I had waited so long to start making my jam is because I procrastinated was mortified that I’d screw up making jam as Christmas gifts!  I had heard so many horror stories about runny, yucky tasting jam, and I was not ready to take on the burden of being disappointed.


There is a local pick-your-own  strawberry patch just a few miles from our home.  I picked a lot of strawberries for the main purpose of canning them as gifts for Christmas What I learned last year is that if you don’t want to can throughout the whole season, you can puree fruits in a blender and freeze them for a later date to start canning!  I also did this with blueberries I picked from another pick-your-own orchard.

I honestly believe that the reason I like canning so much is because I wasn’t doing it from May through November.  It was great to make applesauce and apple pie in a jar in October, and then putting everything away until December. 

If your zone is in strawberry season and you would like to learn (visually) how to can, I will be posting a vlog in the next few months teaching you how to do so.  It truly is very easy, and it can be done with less than $50 in equipment!  Until then, pick your berries, puree them in a blender or food processor and stick them in the freezer.  They will taste just as good as they did fresh!


Monday, February 6, 2012

Simple Living: Meals

Several weeks ago, I noticed that my meals have been lacking in a big way.  I have had no creativity, and I’m lucky if we get a meat, potato and vegetables with dinner.  I have been making the same thing over and over again, and it’s been very dull.  I am very fortunate to have a husband who loves to cook.  With his rotating schedule, I get several days throughout the week of not having to worry about what’s for dinner! 
I have found a few ways to resolve my recent lack of cooking inspiration all while keeping it simple and saving time.   This is what I’ve found:

KISS (Keep It Simple Stupid)


I have big dreams of making these extravagant meals for my husband with ingredients I’ve never heard of and have never tasted before in my life.  I can picture it in my mind: a nice salad, a great meal, some biscuits or rolls on the table and a glass of wine with dessert afterwards.  The truth of the matter is that this is not going to happen!  Yes, sometimes it does when I have all day to prepare it, but on days I work, it’s not!

I am the queen of 5 (or 6) ingredient dishes.  We have our usual favorites, but it is time to add to that list of meals.  I can somewhat achieve my dream of having a really nice meal by making these types of meals in the morning before work, heating them up before hubby gets home and whipping together a small salad. 

There are a lot of resources online that will give you hundreds of recipes with five ingredients or less.  This link shows how many websites have 5 ingredient recipes listed on them.  But I must admit, this one is my favorite for the simplicity.  Many of these recipes require items that are staples in our house, which is why I love them!  No extra (unnecessary) trips to the grocery store to pick anything up!

Don’t forget to check out your local library to see if they have any simple recipe books that you can take out and experiment with the recipes. 

Also, in the line of simple meals, I love to buy roaster chickens.  Not only are they inexpensive per pound, you can you get a meal out of the meat (you can cook it in a crock pot and it falls off the bones!) and afterwards boil the bones to make your own chicken broth.  Add some onion, carrots, celery, left over meat from the chicken carcass and at the end, some egg noodles, and you’ve got yourself a great bowl of chicken noodle soup!  Or chicken and rice soup, whatever you prefer. If you don’t want to make chicken noodle soup, still boil the bones and freeze the chicken stock for recipes calling for it in the future (without having to buy it in the store!)


Use a crock pot

Really, there is nothing easier than throwing dinner in the crock pot and leaving it until dinner time.  I found a great book called Six Ingredient or Less Slow Cookers by Carlean Johnson.  Now this is my type of cooking!  6 ingredients and in a crock pot!  It’s kind of like that commercial, “Fix it, and forget it!” 

I think I’ve used the crock pot more in the past two weeks than I have in the last year.  It is a great way to create something different and not have to stand over the stove all day to make it. 

Crockpot meal at 7:30 AM

Dinner is ready at 6:35 after I get home from work!

Make a double batch & freeze it

After deciding that a recipe is a “keeper,” make a double batch the next go-around.  Immediately freeze the extra portion and thaw it out in a few weeks when it is time to make a meal.  There is nothing better than having a delicious, homemade meal even if it was made a few weeks or a few months ago!

If you only have pieces parts…

There are times that I put off going to the grocery store until we literally have nothing in the fridge but mayo and orange juice!  When the pantry and fridge is looking sparse, try SuperCook and put in the ingredients you have in the cupboards.  It will come up with new recipes using the items you have in your home! I have used it many times to come up with a new recipe with the very little we may have in the cupboards.


Have fun with it

I love to cook, but at times, I dread it.  I like to cook when I want to cook, not when I have to.  It seems after making a few simple yet delicious meals, I become more adventurous.  Remember to set aside a portion of each meal for future use.  There is nothing better than opening up the freezer to decide “What’s for dinner?”

I have taken out the following books from the library and they have already provided several meal ideas for me.  They include:


  • Fix-It and Forget-it 5 Ingredient by Phyllis Pellman Good
  • Once-a-Month Cooking Family Favorites by Mimi Wilson

Happy cooking!

This post is linked up with Mom's Best Nest Flock Together Blog Hop!

Thursday, December 15, 2011

2012 Goals

With every New Year, I feel like I have a fresh start, and this year is no different.  This year, I am posting my goals for everyone to hold me accountable!  I will be posting updates every month as to how the goals are coming along.  This is what my personal goals look like for 2012:


Spiritual
  • Daily Devotional: Read The One Year Bible (I enjoyed reading the Bible in 90 Days, but I would like to slow it down this year!)
  • Find a church that is a fit for our family

Marriage
  • Read one marriage book a month and put it’s teachings into practice
Health / Personal
  • Eat healthfully (more fruits and vegetables, less meat, carbs and sugars)
  • Create and maintain a cleaning routine
  • Lose 50 lbs (that’s only a pound a week – achievable!)
  • Decrease the amount of “stuff” in our home (Purge-A-Palooza 2012! - will talk about that next week)
  • Volunteer at the Happy Trails Animal Sanctuary (a monthly commitment) 
Financial
  • Sponsor a child in need
    • When I started making my list of goals in October, as soon as I had this goal listed, a fellow blogger wrote about how she and her family sponsor a child through Compassion.  After a lot of research about the ministry, we sponsored a child 11/11/11!  It is amazing how God put everything into place!!
    • It is our goal to sponsor another child, but this time, through another organization called Amazima.
  • Save $5,000 toward a replacement vehicle/maintenance
  • Invest 5% of our take-home income into a Roth IRA
  • Sponsor a pot bellied pig at Happy Trails Animal Sanctuary
Environmental 
  • Less pre-packaged food / more cooking from scratch
  • Reduce use of paper towels and paper napkins replacing them with cloth
  • Lower resource consumption (electric / propane / water)
    • Electric use of primary residence over past 12 months=15,298 kWh
    • Electric use of the house we own next door over past 12 months=6,876 kWh
      • We expect this number to be drastically lower due to the fact that we are no longer heating the shed, which was our pot bellied pig and puppy’s abode last winter
  • Install energy-saving power strips throughout home
Gardening & Preserving
  • Grow enough tomatoes, green beans, snow peas, squash and green peppers to be used through the fall and winter 2012 and spring 2013
  • Can at least 24 quarts of tomatoes (sauces, stewed tomatoes, etc)
  • Freeze at least 50 pint-sized bags of vegetables
  • Plant at least 3 concord grape vines

 What are your goals / aspirations / resolutions for 2012?

Thursday, December 1, 2011

Christmas is Around the Corner!

Christmas is just around the corner, and the little elves have been working quite a bit around here to prepare for the upcoming holiday.  This is what they have completed:
62 bottles of homemade wine (2 different flavors)
13 large bottles of homemade strawberry margaritas

52 bottles of homemade microbrew beer

Jars of applesauce & applie pie in a jar

Coming up in production:

Jam
Apple Butter
Crafts

How are you preparing for the Holidays?

Wednesday, November 16, 2011

Homemade Fire Starters

(This post is a little late in the season to write about but I figure better late than never, right?) 

Fire starters are a great way to start a fire quickly and easily without any fanning or having to create a teepee out of wood!  They aren’t only great for wood burning fireplaces, but they are great to be used when having a bonfire outside or going camping!  Homemade fire starters don’t take up much space, are simple to make, extremely effective when starting a fire and cost nothing to make!


Ingredients:

  • Sawdust
  • Candle wax
We use sawdust and candle wax.  We get sawdust by chopping the wood needed for the winter months and collecting it while it’s dry.  The candle wax has been obtained for free from Freecycle.org and remnants of candles we have burned around the house over the year. 

 Instructions:

  • Melt wax in a large pot enough to be able to stir easily (do not boil)
    • You can also use boiling water and a glass jar like a double boiler if you don’t want to dirty the pot with these ingredients
  • Stir in sawdust so that the sawdust is lightly coated with wax
  • Scoop out into clumps and let dry
We keep our fire starters in a couple of baskets next to the wood burning stove.  We use one to start up the fire and try to maintain the fire to a comfortable temperature.

Photo Credit


 A friend of mine  makes her own fire starters as well, but not with sawdust.  This is how she makes hers:

Ingredients:

  • Paper egg cartons (not styrofoam)
    • You can also use little paper cups, paper cupcake liners, the cardboard core of a paper towel or toilet paper roll (cut into smaller pieces)
  • Dryer lint
  • Candle wax or broken crayons

 Instructions:

  • Place a small pot of water on the stove to boil
  • Put candle wax remnants and/or crayons in a glass jar and place in the pot of hot water to melt down
  • Open the egg carton and cut off the top
  • Take small pieces of dryer lint and put them in each of the egg compartments of the egg carton
  • When wax in the jar is melted down, pick up with an oven mit and pour a little wax over each lint-filled egg compartment
  • Let dry / harden
  • Cut out the 12 egg compartments
  • Store for future use
  • Place one in a fire with wood in it and watch the wood catch fire!
We don’t buy eggs from the store because we have chickens to lay eggs for us. If you are in the same boat, you can ask family, friends and neighbors to keep their egg cartons so that you can make these starters, or pot an inquiry on Freecycle.org or Craigslist. 

Good luck and have fun!

This post is linked to Homestead Revival's Barn Hop!

Friday, October 14, 2011

Recipe: BBQ Chicken Pizza

I have heard of people making chicken BBQ pizza before, but it never really appealed to me until I tried it at my father’s house a couple of weeks ago.  I made it for dinner a couple of weeks ago and it was awesome! 


This is how I made it:


  1. Make the pizza dough (see below for recipe)
  2. Spread out the dough on your pizza stone or pizza sheet
  3. Apply BBQ sauce to the dough
  4. Add chopped up chicken over the BBQ sauce
  5. Place mozzarella cheese over the chicken
  6. Bake for 15-20 minutes at 450 or until dough is fully cooked
  7. Enjoy!

Steps 1 & 2

Step 3 

 Step 4

Step 5
 

Step 7
(I had to add some shredded cheese because we ran out of mozzarella!)

I couldn’t believe how simple this was to make and with very few ingredients, it was right up my alley!  This recipe is a keeper in our home!


Our favorite homemade pizza dough recipe:

1 cup hot water
2 1/4 tsp yeast
1 tsp salt
3 Tbsp olive oil
3 Tbsp Italian Seasoning
2 1/2 cups flour

Mix together the hot water and yeast, then add the the other ingredients.
Bake at 450 for 15-20 minutes. 


This post is linked up with Weekend Blog Hop and Frugal Friday's.

Wednesday, October 12, 2011

Frontier House: PBS Series

I recently watched Frontier House that aired on PBS back in 2002.  Frontier House is a series of 6 episodes where 3 modern-day families went back to live the life of a family in 1883 for 5 months. Back in 1883, people came from all over to claim their 160 acres of land, but only after living on their frontier for 5 years:  1 out of 3 families survived the life on the frontier.
The families that PBS chose were pretty interesting. 

  • The Brooks Family: This family is an African American family, which they said were more common on the frontier back in 1883 than books portray.  At the beginning of the series, Nate and his father, Rudy were at the homestead for the first five weeks to help build the homestead.  Then Nate’s (real) fiancé, Kristen came and they got married on the homestead. Rudy left the frontier and let his new daughter-in-law resume life with her new husband on the frontier.
  • The Clune Family:  This family is from Malibu, California where the father was an executive for a company and they appear to be pretty affluent.  The mother, a native of Ireland, was a stay-at-home mom and they had 3 children.  For some reason, the Clune family also brought their niece to the Frontier House.
  • The Glenn Family: The Glenn family is a blended family from Tennessee.  This is the second marriage for the mother and her children are from her previous marriage.  Throughout the series, you can pretty much watch the relationship of the mother and her husband unravel – it is really sad, because the children were thriving on the frontier. 
For 5 months, these families had to help build their own cabins (except the Glenn Family who got a pre-built cabin in their scenario.)  From the very beginning, the families got a real taste of what it was like to travel to their destination and what obstacles the pioneers faced (I wont spoil it for you – you have to watch it!) As the viewer, you get to watch what day-to-day life was like for the women, children and the husbands.  It was great!

I often romanticize about living life back in the 1800’s, but after watching this series, the “simple life” was not so simple!  I would love living off the land, but I do have my limits.  Anyone interested in homesteading or learning about what life was like back in 1883, I highly recommend this educational DVD!


DISCLAIMER:  I was in no way compensated to provide a positive or negative review on this video.  I watched the DVD out of my own curiosity and all opinions expressed are my own.   

Monday, October 10, 2011

Apples Galore!

Around this time last year, Todd and I found an awesome vineyard and orchard in North East, PA that sold “deer apples” at $4.00 for a little more than a bushel.  Deer apples are apples that have fallen from the tree, but they aren’t necessarily bad.  Actually, the majority of the apples are perfectly fine, many without any blemishes at all!  When we got home, I was just dieing to find out how much the box of apples weighed, and they were 53 lbs.  Now that’s a good price on apples ($0.08/lb!)  I gave some away, made several batches of applesauce, apple pie filling, apple bread, apple dumplings, and we just ate the apples too.

This weekend, Todd and I made a special 2 hour road trip to pick up deer apples, take in the beautiful fall colors of changing leaves and explore the area a little bit.  I called the orchard ahead of time to make sure they had the apples available and to confirm the pricing.  The deer apples went up $1/box, but at $5/box, they are still a great deal!  We ended up picking up 3 cases.


When we got home, we weighed them as we did the year before, and this year, we have 135 lbs of apples.  You didn’t read that wrong.  One hundred thirty five pounds of apples!  This equates to $0.11/lb for apples this year.

This is what 135 lbs of apples looks like!

Over the next several weeks, I will be posting a lot of apple recipes that I am making as I peel and core the apples.  (Hopefully I will have time to post considering I have to get these apples peeled, cored and prepared before we leave for vacation in two weeks! Eek!)  I am looking forward to making several batches of crockpot applesauce (to give as gifts), apple butter (gift), apple cake, apple pie filling (gifts), apple crisp, apple chips, apple everything!

Around November 15th of last year, I mentioned to Todd that I never wanted to see another apple again.  I had peeled and cored over 40 lbs of apples by hand.  This year, I have an applecorer and peeler that my mom got me for Christmas.  This should make it easier on me this year to be able to get these apples cored and peeled in “no time” (meaning a few weeks!)

The apple corer/peeler my mom got for me last Christmas.

If you have any awesome apple recipes, I’d love to try them out!  Please email me at sparingchange@gmail.com .

Thursday, October 6, 2011

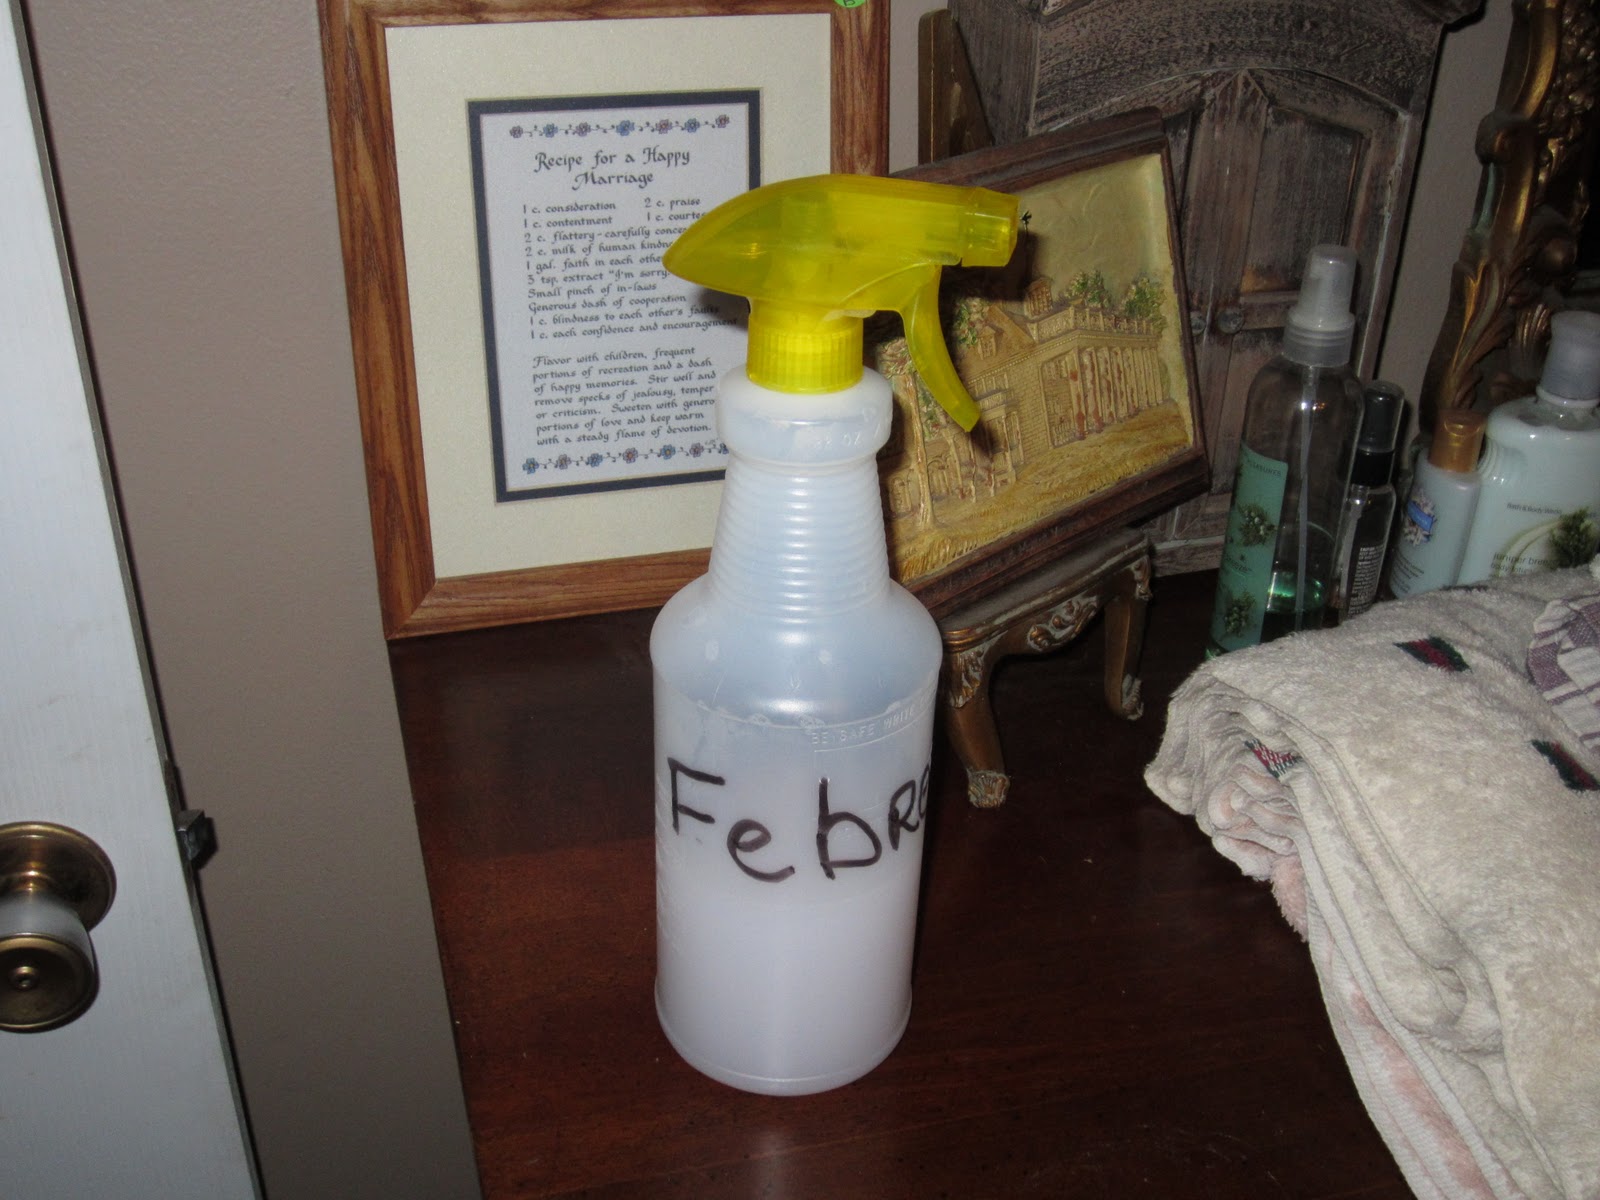
Recipe: Homemade Febreeze

I love when a room smells fresh and clean.  Sometimes, due to projects going on around the house, having (wet) animals running around the house, or accidents, our home does not smell fresh and clean.

The following is a recipe for homemade Febreeze to help keep your furniture, bedding and a room smelling nice and fresh.

Ingredients:

Liquid Laundry Softener
Baking Soda
Water

Directions:

  1. In an empty spray bottle, pour in ½ cup liquid laundry softener
  2. Put in 1 Tbsp baking soda (to help with pet smells)
  3. Fill the rest of the bottle up with water
  4. Before using, shake
Todd uses this solution to freshen up the spare bedroom when someone comes to visit and it’s been sitting empty for a while.  We also like to use this on our sofas, loveseats and wingback chairs to help keep them fresh.

This solution costs pennies compared to the brand name product in the stores!


Wednesday, July 13, 2011

Recipe: Pizza Dough

We love our pizza around here.  Todd has found the perfect dough recipe for us that is super simple and quick!  What's for dinner tonight?  Pizza!

1C warm water
1 Tbsp sugar
2 1/4 tsp active dry yeast
3 Tbsp olive oil
1 tsp salt
2 1/2 cups flour
4 Tbsp italian seasoning (optional – we added this to the recipe)

Mix warm water with yeast, then add the rest of the ingredients.
Let sit for 10 minutes
Spread onto a floured pizza stone or pan and let rise to desired thickness.
Add toppings.
Bake at 425 for 15-20 minutes.

This recipe with all the toppings is less than $2/50 a pizza. As we always say, "Pizza Hut cant do it any better!"

Wednesday, April 27, 2011

Recipe: Waffles

When Todd and I got married, Todd had a waffle iron.  He said we could throw it away because he didnt like it due to the batter sticking to the iron.  This gave me the incentive to find the best waffle recipe I could find.  This is our favorite recipe: 

Waffles:

2 C flour
1 tsp salt (optional)
4 tsp baking powder
2 Tbsp sugar
2 eggs
1 1/2 C milk
1/3 C butter
1 tsp vanilla

Mix it together and pour it into your waffle iron.  They are so nice and fluffy!

Todd prefers the recipe above, but I like to make the waffles a little healthier.  I substitute:

2 bananas for the eggs
1/3 C applesauce for the butter

This makes a thicker batter that can easily be thinned with a little more milk.  I have made this recipe with chunky applesauce and it was delicious!  These waffles can be made in advance and frozen, which is what I am doing this week for our vacation next week!

Also, if you dont have a waffle iron and would like to make homemade waffles, this is the time to pick one up at a garage sale.  I see them all he time for a buck or two because people dont use them.  We absolutely love our homemade waffles and make them at least twice a month.

Tuesday, April 26, 2011

Our HomeMade Chicken Coop

Our homemade chicken coop is a hybrid between two plans we liked in a book checked out from the local library.  It cost approximately $125 to make the coop; however, it is much bigger than we need it to be.  It could easily house 6-10 chickens.  We are looking forward to this house being a home to many chickens over the next several years! 


The Coop

Nesting Box /Main Area

Nesting Boxes

Looking into Main Area / Nesting Box

Back Door
The chickens will also have an area to run around in outside of their pen.  That is still being constructed.

I have seen coops made from wire and a plastic dog house.  The coop could be made from whatever you want, as long as it keeps the predators out.

Wednesday, April 20, 2011

Vlog : HomeMade Cinnamon Rolls


There is a first time for everything, right?  This was our first attempt at a vlog.  Truth be told, I can’t stand cameras and I really do not enjoy being recorded.  I sucked it up because I wish I had this when I made these cinnamon rolls for the first (and second and third) time.  I thought it would make it easier to see how simple it is to make homemade cinnamon rolls versus post the recipe that I use from eHow.  This recipe is not exactly healthy, but they are really good and extremely simple to make.  They store well for several days in a Tupperware container (though they don’t last more than 3 days in our home).  We like ours warm, so we nuke them in the microwave for 30 seconds before eating.

If you make a healthier version of these cinnamon rolls, I want to know about it! What did you substitute and how did they taste?

Finished Product
Cost Analysis:

Tube of Cinnamon Rolls from Aldi’s : $1.89 (Yield: 8)
$1.89 / 8 = $0.24/cinnamon roll

Homemade Cinnamon Rolls: $0.78 (Yield: 16)
$0.79 / 16 = $0.05/cinnamon roll

This is how I came up with this cost:

  • Flour - $0.14
    • 4 cups per lb
    • $1.39/5 lbs = $0.278/lb
    •  $0.278/4 cups = $.0695/cup
    • 2 cups used = $0.139
  • Sugar - $0.15
    • 2 cups per lb
    • $2.39/4 lbs = $0.5975/cup
    • 1/4 cup used = $0.149
  • Brown Sugar - $0.13
    • 2 cups per 2 lb bag
    • $0.99/ 2 lb bag = $0.495/cup
    • 1/4 cup used = $0.1275
  • Butter - $0.22
    • 4 sticks - $0.69
    • $0.1725/stick
    • 1 1/4 sticks used = $0.2156
  • Milk - $0.08
    • 1 gallon is $1.99
    • 16 cups per gallon - $.1243/cup
    • 2/3 cup used = $0.0828
  • Cinnamon - pennies (assuming $0.03)
  • Baking Powder - pennies (assuming $0.03)
     But the question is, are they good?

I think the face says it all... (and puppy begging)