Wednesday, March 28, 2012

Different Flavors in Eggs (Store-Bought vs. Fresh)

One of my favorite breakfasts is dippy eggs and toast.  For me, there is nothing better in the world.
A couple of weeks ago, Todd was extremely sick, and the only thing he could eat was eggs and grits!  The chickens weren't producing enough eggs to keep up with Todd eating them, so I had to buy eggs from the grocery store.

Our eggs vs. store-bought eggs


Everyone always talks about the difference in farm fresh eggs and store-bought eggs.  When we made the transition to our chicken's eggs exclusively (when they produced enough for us), I really couldnt tell the difference. 

This past weekend, we had a couple more white eggs in the fridge, so I decided to do a taste test.

Can you tell which is the store-bought and which is the brown chicken egg?


I was surprised not to see that much of a difference in the egg while cooking.  The store-bought egg is on the left, while the brown chicken egg is on the right.

Even though they looked the same, the taste in fact was very different.
To me, when I ate the store-bought egg, it didnt taste like anything!  When I started dipping into the fresh chicken egg, you could actually taste the creamy yolk flavor.  It was delicious!

This may be based on the fact that I am now completely spoiled with farm-fresh eggs every day, but we will continue to own chickens strickly for the eggs.  They are so delicious!

What has been your experience?

Monday, March 26, 2012

Edible Landscape

About a mile away from our home, there is a woman who lives on a city-like lot of less than ¼ acre.  She has very little yard, and what she does have is in the front of her house.  Last year, while I drove by her house to go into town, I noticed she had dug up rows in her front yard.  I was curious as to what she was doing.  By May, I figured it out: she planted an edible front yard of tomatoes exclusively!  Though it wasn’t the prettiest yard to look at on the street, I saw bright red tomatoes in her front yard every week when I drove past her home and I had to smile to think about what she was doing with all that produce!


As I walk around our yard, I get the feeling that we could potentially eat quite well (minus meat, dairy and grain) off our property.  We live on 1 acre of land divided up in two parcels.  I found this great diagram  from Ohio State University’s website that shows how to have an edible landscape in our zone (zone 6) even on the smallest of properties.

Over the next two weeks, I will walk you around our two parcels of property and show you how we are making it the most efficient we can in terms of growing our own fruits and vegetables. 

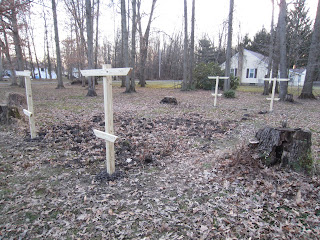
A picture of our property.  We own to the street at the very end of this road.

To those who would like to join me, please start getting ready to link up next week.  I would love to see how you “live off your land.” 

Thursday, March 22, 2012

You Know You're Frugal When...

I am a member of a great frugal messageboard, and a few months back, someone started a thread entitled "You know you're frugal when..."  I absolutely loved the responses.  They not only made me laugh, but made me realize how much in common I have with the members.
So, I am going to start a message here on the blog, because I want to hear what you have to say.

These are just a few from my own personal experience.

You Know You're Frugal When...
  • Even the dollar theater seems to be too expensive to watch a movie
  • You patch the same area of a pant three times in hopes to make it last just one more year (and then patch it again anyways)
  • You dont like to buy anything unless you determine whether or not you can make it yourself
  • Your favorite department store is the Thrift Store
  • Someone walks around with their new "name brand" purse and you remember that you got your vintage tan leather Gucci purse from a flea market for $10!  And the wallet inside cost less than $0.50! (I've had the purse for years, and I still love it!)
  • You balk at the vending machine because you know you can buy a box of animal crackers for the price of two small bags from said vending machine
  • You prefer making a homemade pizza for less than $1.00 instead of ordering a pizza from even your favorite pizza joint
  • You wont even spend $10 for a haircut at Great Clips (including tip) because you can do it yourself!
  • People make fun of how proud you are of your $2 shoes from a garage sale or $0.50 sweater from the Thrift Store
  • You realize that you are a minority in the way you think about money
  • You think your 5 1/2 year old, paid off vehicle with 145,000 miles on it is the best vehicle ever and you talk about driving it for another 200,000+ miles or until the wheels fall off!
  • You think the best meal out to eat is one that is free! (We love gift cards from Christmas, and use them sparingly throughout the year!)

These are just a few of mine.  What are yours?

Friday, March 16, 2012

Shipping Books Sold on Amazon

Earlier this week, I showed you how to list unwanted books on Amazon.com.  Within 24 hours of me listing about 20 books, I sold 4! (Yay!)


This week, I will show you how easy it is to ship your books through Amazon.

Step 1: You will get an email


Step 2: Log into Amazon

Step 3: Click "Your Account" on upper right of page

Step 4: Click on "Your Seller Account" on the right hand side of the page

On the top left of your seller account page, it will show you how many books you have to ship.


Step 5: Click "View Unshipped Orders"

The next page will show you what you need to ship.

From this, screen, you can print a packing slip, buy postage from Amazon and notify the buyer that the order was received and shipped.


Step 6: Print packing list

This will tell you where the book is being shipped as well as a packing slip to put in the mailer with your book.

Step 7: Buy shipping service from Amazon


You enter the weight of the book.  I usually just type in the "suggested" weight, as I dont have a scale.

Step 8: Choose your shipping option


I choose Media Mail, because it is the least expensive and books can be shipped this way.
I also pay $0.19 for a delivery confirmation, just so I know when the customer receives their book.

Step 9: Confirm shipping price and click "Buy shipping services & confirm shipment"


Step 10: Print the shipping label

Step 11: Package your book and put it out in the mail for the mail carrier to pick up!

There you have it!
It is that simple to list your books and to get them out of the house (along with  making a little extra money).

Good luck and happy selling!

Thursday, March 15, 2012

And the Winner Is...

First off, I want to thank everyone who entered for the raspberry canes.  I am astonished how many of you are interested in them!  I also want to thank everyone for spreading the word on Sparing-Change to their friends, family and other bloggers. 

That being said, the winner of the 10 red raspberry canes is...


Congratulations, Jon!!!

And again, thank you to everyone who entered the giveaway!
I may have to do this in years to come to help thin out our red raspberry patches and to spread the yum!

Wednesday, March 14, 2012

Selling Unwanted Books on Amazon


Last year, I had success selling unwanted books* through Amazon.com.  In this post, I will show you from the very beginning how easy it is to list, sell and ship books through Amazon.  This post assumes that you already have an Amazon.com account set up.

Step 1: Sign In to your Amazon account


Step 2: Click on “Your Account” in the upper right of the screen


Step 3: Click on “Sell Your Stuff” on the right side of the screen

Step 4: Enter the ISBN number from the back of the book


Step 5: Once you enter your ISBN, find your book and click "Sell Yours"


Step 6: Enter information about book

In the lower right of the screen, you will find pricing information on the book you are trying to sell. It gives you the list price, and what other people are selling the book for.  This one, as you can see, does not sell for much.  I will list it at $0.01, and will still make a little bit of money (because Amazon charges more for shipping than what it really costs to ship an item.)  You want to make sure you sell your books for enough that you actually make money.  I sold one at $0.01, and I forgot all about the Amazon fees!  I made nothing on it.


Enter the shipping method you prefer.  For me, I like to send it out myself, and I dont give expedited options. 


Click "Continue"

Step 7: Review your submission

As you can see, with this listing, after all of Amazon's fees are taken out and with the shipping credit, I would receive $1.66.  This doesnt seem like alot, but I will be listing about 25 books and it takes me about 15 minutes.  I will take what I can get.

Click "Submit your listening"

Step 8: Successful listing!

Congratulations! You have listed your first book!
To manage the books you have listed (you can adjust pricing and information you want to provide on the book), click the Manage Your Inventory link.  If you want to keep listing books, enter the ISBN number to the right, and you start the process all over again (starting with Step 5 above).

It really is THAT simple to start selling books on Amazon.
Once a book sells, I will walk you through how easy it is to ship the book.
Happy listing!!

*I generally do not buy books; however, my grandma and mom are always giving them to me!  After I read the book, I do not like them sitting around the house, so I sell them.  It cuts down on the amount of “stuff” in our home, and it makes us a little bit of money!

Monday, March 12, 2012

The Cost of Gardening (February)

Last month I decided I wanted to keep track of how much we spent on the garden.   I received a lot of great feedback from new readers hopping over from the Homestead Barn Hop.  I re-read the post, and I can see how it may seem that the garden was all about the money spent and whether or not it was “worth it.”  I even said those words, but that is not what I intended.

I love to garden and have for about 5 years since Todd built my first raised-bed garden at a house we resided in Akron.  Whether or not we spend $500+ on this year’s garden or $75, it will be “worth it” to me.  One main reason is because I know where the produce is coming from, which is a big deal to me.  Also, I am attempting to sustain our family with the fruits of our labor through fall, winter and spring.  I really cannot put a price on that.

 In February, we had some unseasonably warm weather in the beginning of the month! I was even able to hang a load of laundry out on the line February 5th!!


We had big plans to rent a tiller and dig our new garden (20’x 34’), and as soon as we determined what we were going to do and who we would rent the tiller from, temperatures dropped and the ground was too cold!  And then the snow covered the ground! 

New garden area (you can see the lines)


Later in the month, Todd read about straw bale gardening and he wanted to try it out.  The day he found out about the method, we both were looking into it, and we decided to start looking for straw!  We found a gentleman about 30 minutes away that had 20 bales of straw at $3/bale, so we hooked up the trailer that very evening and made the trek to pick up the straw. 


We always say that our life together is an adventure, and it definitely was on this trip: but a fun adventure!  We went through several towns we didn’t know were so close by, and they were gorgeous!  It made our small town look like a big metropolis!

Total spent in February on the garden: $60
Total spent on the garden to date:  $95.29

I also want to note some great ideas that came from the comments on last month’s post. One commenter, Ten Things Farm, mentioned getting seeds at the end of the season from Ace Hardware for $0.10/packet!  We have an Ace right here in town and I never thought about purchasing seeds on clearance!  Oh, how I love clearance items.  I will definitely be doing that this year!!  She also mentioned asking Freecyclers or Craigslisters for tools or supplies we may need for the garden.  I will tell you, I asked Freecyclers in our area about mason jars several years ago, and I have yet to use all of the free jars we received (and I even gave some away with Christmas gifts in them last year!)  Brilliant idea! 

Here’s to another great month of preparing for 2012’s garden!
With the unseasonably warm weather, it is a lot easier to prepare and get things done!

How are things coming along in your garden this season?

Saturday, March 10, 2012

Giveaway: Red Raspberry Canes


This weekend, Todd built some raspberry trellis' in our new red raspberry patch.  He did such a great job.  I cant wait for the transplanted red raspberries to start to grow for the season.

While transplanting the red raspberries, I realized that we have ALOT of canes.  More than we need (OK, lets be honest, more than I want to transplant!).  When we purchased the house, I bought 5 canes and planted them on the side of the house.  Then, the next year, I bought either 25 or 50 from ebay and planted them.  Now, 4 years later, they have multiplied to a couple hundred canes!!

This giveaway is for 10 red raspberry canes. (Planting and maintenance instructions will be provided.)

How to Enter:

Leave a seperate comment for each entry.
  • "Like" Sparing-Change on FaceBook
  • Tell your friends on FaceBook about this giveaway
  • Tell me what you are planting in your garden this season
  • Do you have any fruit around your property?
(United States residents only.)

Giveaway ends Wednesday, March 14th at midnight.  The winner will be announced Thursday, March 15th.


My hope is that you will start your raspberry patch with the help of these canes, and they will provide delicious fruit for you for years and years to come!

Good luck!

This post is linked up with the HBC Friday Home-Making Link Up , Homestead Revivals Blog Hop, Cozy Home Scenes and the Spreading Love Weekend Blog Hop.

Thursday, March 8, 2012

No 'Poo Experiment: Week 3

Week 3 has come and gone, and I have had the same results the whole way through.  I will admit, I went 3 days without washing my hair during the work week!  I felt a bit grungy going to work without washing my hair, but I still did it!


Clean Hair (bad lighting)

Clean Hair

Hair after 3 days of no washing: Ick!

 I have decided that I will continue with the No ‘Poo lifestyle.  It hasn’t impacted my routine at all, and I like the way my hair turns out without shampoo!  I used to have to switch between shampoos because one would weigh my hair down if I used it too many times in a row.  With the baking soda, I haven’t had that problem at all.

As a recap, this is what the results have been:

Clean Hair w/ Shampoo
No 'Poo Week 1


No 'Poo Week 2 

No 'Poo Week 3

To read about the results over the last three weeks, you can go to:


Monday, March 5, 2012

Purge-A-Palooza: Bedroom

I had purging the bedroom on my to-do list all month, but it wasn’t until February 26th that I actually did something about it! 
I only got the closet purged in February, which was a daunting task for me.  In the next picture, you will see why it was such a discouraging task for me.

Closet Head-On

Down Below

On the Shelf

More Shelf Shots
I am embarrassed to admit that this was my side of the closet.  In comparison, this is Todd’s side of the closet:

Todd's Side of the Closet
Luckily, it only took about 15 minutes to get everything out of the closet to start my piles of save, purge, and garbage.  The pile of “purge” items grew quickly.  I have noticed that most of my clothes have stains on them.  I am so terribly hard on my clothing, which is why I don’t buy anything that is white or expensive!  I hated to do it, but I got rid of a pair of boots that I absolutely love...not to mention they cost me a pretty penny.  I wore them to a club once and suffered the whole entire time.  So, after 10+ years, I finally let them go after wearing them twice.  It’s so silly, if you think about it.  All they were doing in my closet was collecting dust.  I also got rid of another pair of shoes that I really liked, but they hurt my feet as well.

My Favorite Stiletto Boots

Work Shoes That Always Hurt My Feet!

Within 30 minutes, I was starting to put everything back into my closet.

This is what my closet looks like today.

Where Are All My Clothes?!?

Floor

Shelf

Shoe Holder

I donated a very large trash bag full of shirts, shoes and slippers from the items purged in the closet alone!  I still have to go through an armoire and my night stand.   With all of this extra space in the closet, I may start transferring some of my clothing from the armoire to the closet so I can see what I have.  I found 4 shirts I forgot I owned while cleaning the closet!  I will try to work on my armoire and night stand within the upcoming week and post the results mid-month.

For March, I am going to purge items from the Family Room.  Ugh.  I'm NOT looking forward to this room!

I would not be telling the truth if I said I enjoy doing this; however, I do enjoy the results after the job is complete!

Thursday, March 1, 2012

No 'Poo Experiment: Week 2

It has been two weeks, and I’m still going strong with theNo ‘Poo Experiment I am thrilled with the results.  I will have to say, nothing is really different about my hair except for the fact that I don’t use chemicals to wash/clean my hair each week!  For the second week into the experiment, I washed my hair only Monday, Wednesday and Friday, and it is doing just fine!


Last week, I mentioned that I needed to do something with my roots.  I have read that peroxide and/or lemon juice sometimes works to lighten hair.

I did exactly what the articles said and took a little bit of hair and put it in a little bowl of peroxide.  They said to wait for 15 minutes.  When I went back, the hair was still really dark, so I left it in the peroxide overnight (because I forgot about it).   The next morning, the hair was still dark, so I gave up.  I took it out of the peroxide and went along with my day. 


The next day, I went to throw the piece of hair away and I noticed it seemed lighter.  I held it up to my roots and it was considerably lighter!  Silly me, I didn’t even think about the fact that my hair is dark when it is wet!  When it dried, it was a nice lighter color!!!

So, on Sunday, I rubbed peroxide into my roots and let it dry.  The next morning, my dark roots were gone!!!  YAY!  This will save at least $12/year in coloring for my hair, not to mention there are no chemicals other than the 3% peroxide that can be purchased pretty much from any store.

I have 3 nearly new bottles of shampoo, and I really don’t feel the need to use them.  I may donate them or just give them to someone who wants them.  I don’t foresee myself going back to using shampoo.  There really is no need!  Hubby and I are going on a 9 day vacation in May, and I was thinking about how easy it will be to take a small container of baking soda with us instead of shampoo, conditioner, hairspray, etc.  It is one less thing TSA can stop us for while going through the checkpoints at the airport and I don’t have to worry about it leaking in our luggage (we only do carry-ons).

I am so glad I took the plunge and tried this method!  I will post results for one more week and will make the determination whether or not this is a life-long change for me.  If everything remains the same, I don’t see why it wouldn’t!