My husband and I purchased our home in 2007 at auction fully
aware that it was a complete fixer-upper.
We liked the fact that we could make the home into what we wanted it to
be and were prepared for it take several years to complete. We did not have a conventional mortgage:
instead, we had a personal loan with a bank that was just enough to pay for the
home. Our plans were to fix up the home
so that we would qualify for a conventional mortgage. After shelling out a lot of money for a new
roof, the next task was to update the kitchen and bathroom and paint all the
walls so that the house would appraise for what we needed to install a new
septic system that was required within 12 months of purchasing the home (side
note: a new septic in our area is the price of a brand new car! Ridicules!!). The goal was to complete these renovations as
quickly and as inexpensively as possible.
This is a photo of the original kitchen and cabinets (please note: that is carpet on the kitchen floor!):
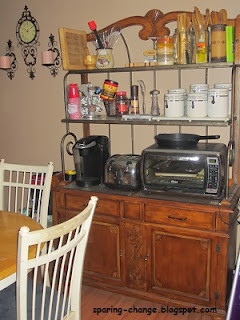
This is the kitchen with some extra cabinets installed, new
appliances, and a buffet area that now houses our microwave and gives us great
storage!
 |
We had these beautiful new cabinets, but we needed
counter-tops for them. To save money, we
used stick-on tiles that appeared fancy schmancy, stripped the grey exterior
paint from the disgusting cabinets and replaced the doors with more modern
cabinet doors from a salvage home improvement store. We found out after year 2 or 3 that the
stick-on tiles were not the best option because they warped and started to turn
up at the edges. Unfortunately, I do not have a photo of what the kitchen has looked like for the past 5 years.
Memorial Day weekend, Todd and I went out shopping for real
tiles to replace our kitchen counters.
We found a great deal on neutral colored tiles at Lowe’s for $0.57/sq
ft! For $60, we purchased enough tiles
to redo our counters. We purchased
mortar and grout for pennies on the dollar thanks to damaged bags at Lowe’s
(original price was over $23/bag: we got for $3/bag). The only other expense was a tool to cut the
tiles that cost $50. So for less than
$125 and a lot of physical labor, this is what our kitchen looks like today.
I absolutely love the way the kitchen turned out. Everything that used to be on the counters
(convection oven, toaster, can opener, bread box, flour/sugar jars, etc.) are
now housed on either the baker’s rack or in the cupboards (thanks to some major decluttering!).
I enjoy our kitchen so much more now than I ever have
before. We have learned one very
valuable lesson with this house: quality is better than trying to do
something as inexpensively as possible!
Because we did not do this when we first moved into the home, we have
already had to redo our bathroom (in 2010) and now our kitchen. We know better now for upcoming home
improvements to spend a little bit more money and make improvements that will
last a long time!
It just so happens that this improvement was inexpensive to
complete and we got great deals on the supplies needed! Win-Win!


Your kitchen looks great and it's so big!! I love how y'all update/upgrade for so little.
ReplyDeleteThank you, Rachel. Our original kitchen seems to be around the same size as your kitchen, but hubby had the idea to add the additional cabinets to make a bar area (and be able to install a dishwasher) and the buffet area on some blank walls we had. It was one big, awkward open space when we bought the house with a metal railing that kept one from falling into the sunken living room next to the kitchen. The living room and master bedroom (next to kitchen/dining room area) were an add-on to the home, which is what makes the floor plan so awkward.
Delete